Yes, it definitely is. In this article, you will learn how to set up your own farm on concrete/asphalt. This step-by-step guide is inspired by Kajodlingen’s new farm at Lindholmen, and our own design of a commercial farm on asphalt at Slakthuset. If you haven’t already watched our Vlog on Kajodlingen’s new growing site, watch it here and get inspired! Otherwise, read on to find out more on how you can grow on concrete.
Things To Watch Out For
Often enough, it is not possible to grow directly on concrete and you would need a medium for your plants and crops to grow in. This medium is susceptible to all sorts of problems since concrete is not considered a conventional material to deal with when growing crops. Here are some pointers you need to take note of before growing on concrete:
- Dealing With Drainage
It is important to first study how the concrete surface drains water before you install your raised bed. Doing so would ensure that your raised bed would not get waterlogged once installed.
To run this simple study, pour some water on your concrete or paved surface and see where it drains. In common scenarios, the water would usually flow away from structures, towards property perimeter boundaries. Take note of the water’s journey and keep it in mind while building your raised bed.
- Permissions To Grow
Installing these raised beds on concrete could be considered a semi-permanent installation. Kajodlingen acquired permission through the renting of municipal land, which therefore allows them to grow there. Whatever the situation is, if you are planning on doing the same thing or perhaps it is even just growing on private land on your front porch by a sidewalk, it is still important to seek and ensure that you have valid permissions from the property owner to install this semi-permanent type of garden area in the area you decide on.
Building The Structure
To grow on concrete, you need raised beds to hold soil in. Not only do raised beds provide benefits like ample growing space at a reasonable price, they also offer versatility for those with a larger area to fill. Raised beds are necessary for growing all almost all non-soil surfaces. To build a raised bed, you need:
- Materials available to construct sides for your beds.
- Dimensions of the intended growing space (in the case of Kajodlingen, they are using 500 sqm out of 1000 sqm as active growing space).
STEP 1:
First, you need to install your bed on the ground and set a level on top. If the bed is not levelled, have a few small blocks or wedges ready by your side, then lift the end needed to bring the bed to a perfect level, and slip a wedge or block in place to keep it in that position. Be sure that the bed is both lengthwise and width-wise. The frame can be built by simple wooden planks or even blocks of stone or concrete if you need them to be higher or more sturdy. See examples of our design for a concrete farm in Slakthuset below.
In terms of measurements for a larger installation, we will refer to Kajodlingen’s set-up at Lindholmen. They created 12 wooden frames which creates farming blocks as they call it. In each of these 12 farming blocks they have raked the soil to form 6 raised beds at 75 cm width, with a smaller of pathway between these each beds. The frames are around 45-50 sqm big, and with 12 of these blocks, they have around 500-600sqm of growing space in total (enough to make a living for two urban farmers according to their calculations and methods).
STEP 2:
Second, prepare your raised bed liners and add drainage and water-holding materials. If you want to prevent leakage onto surrounding areas (and you probably want to), you should include a raised bed liner when constructing your beds. However, be sure that your soil has a constant, adequate supply of organic matter in order to absorb excess moisture or your lined bed may just become waterlogged.
Option A: Add organic matter or gravel. When designing the farm of Slakthuset, the growers decided they wanted to use a technique of Hugelkultur beds with branches and manure in the bottom of the beds, on top of the liner. Apart from organic matter, you can also use a more facilitating drainage material at the bottom of your bed, for example, a layer of coarse gravel or stones covered with a geotextile membrane at least 8 cm thick at the bottom of your raised beds, over the concrete or pavement (see image above). The geotextile membrane is a crucial component as it prevents the drainage material from clogging and getting mixed up with your soil.
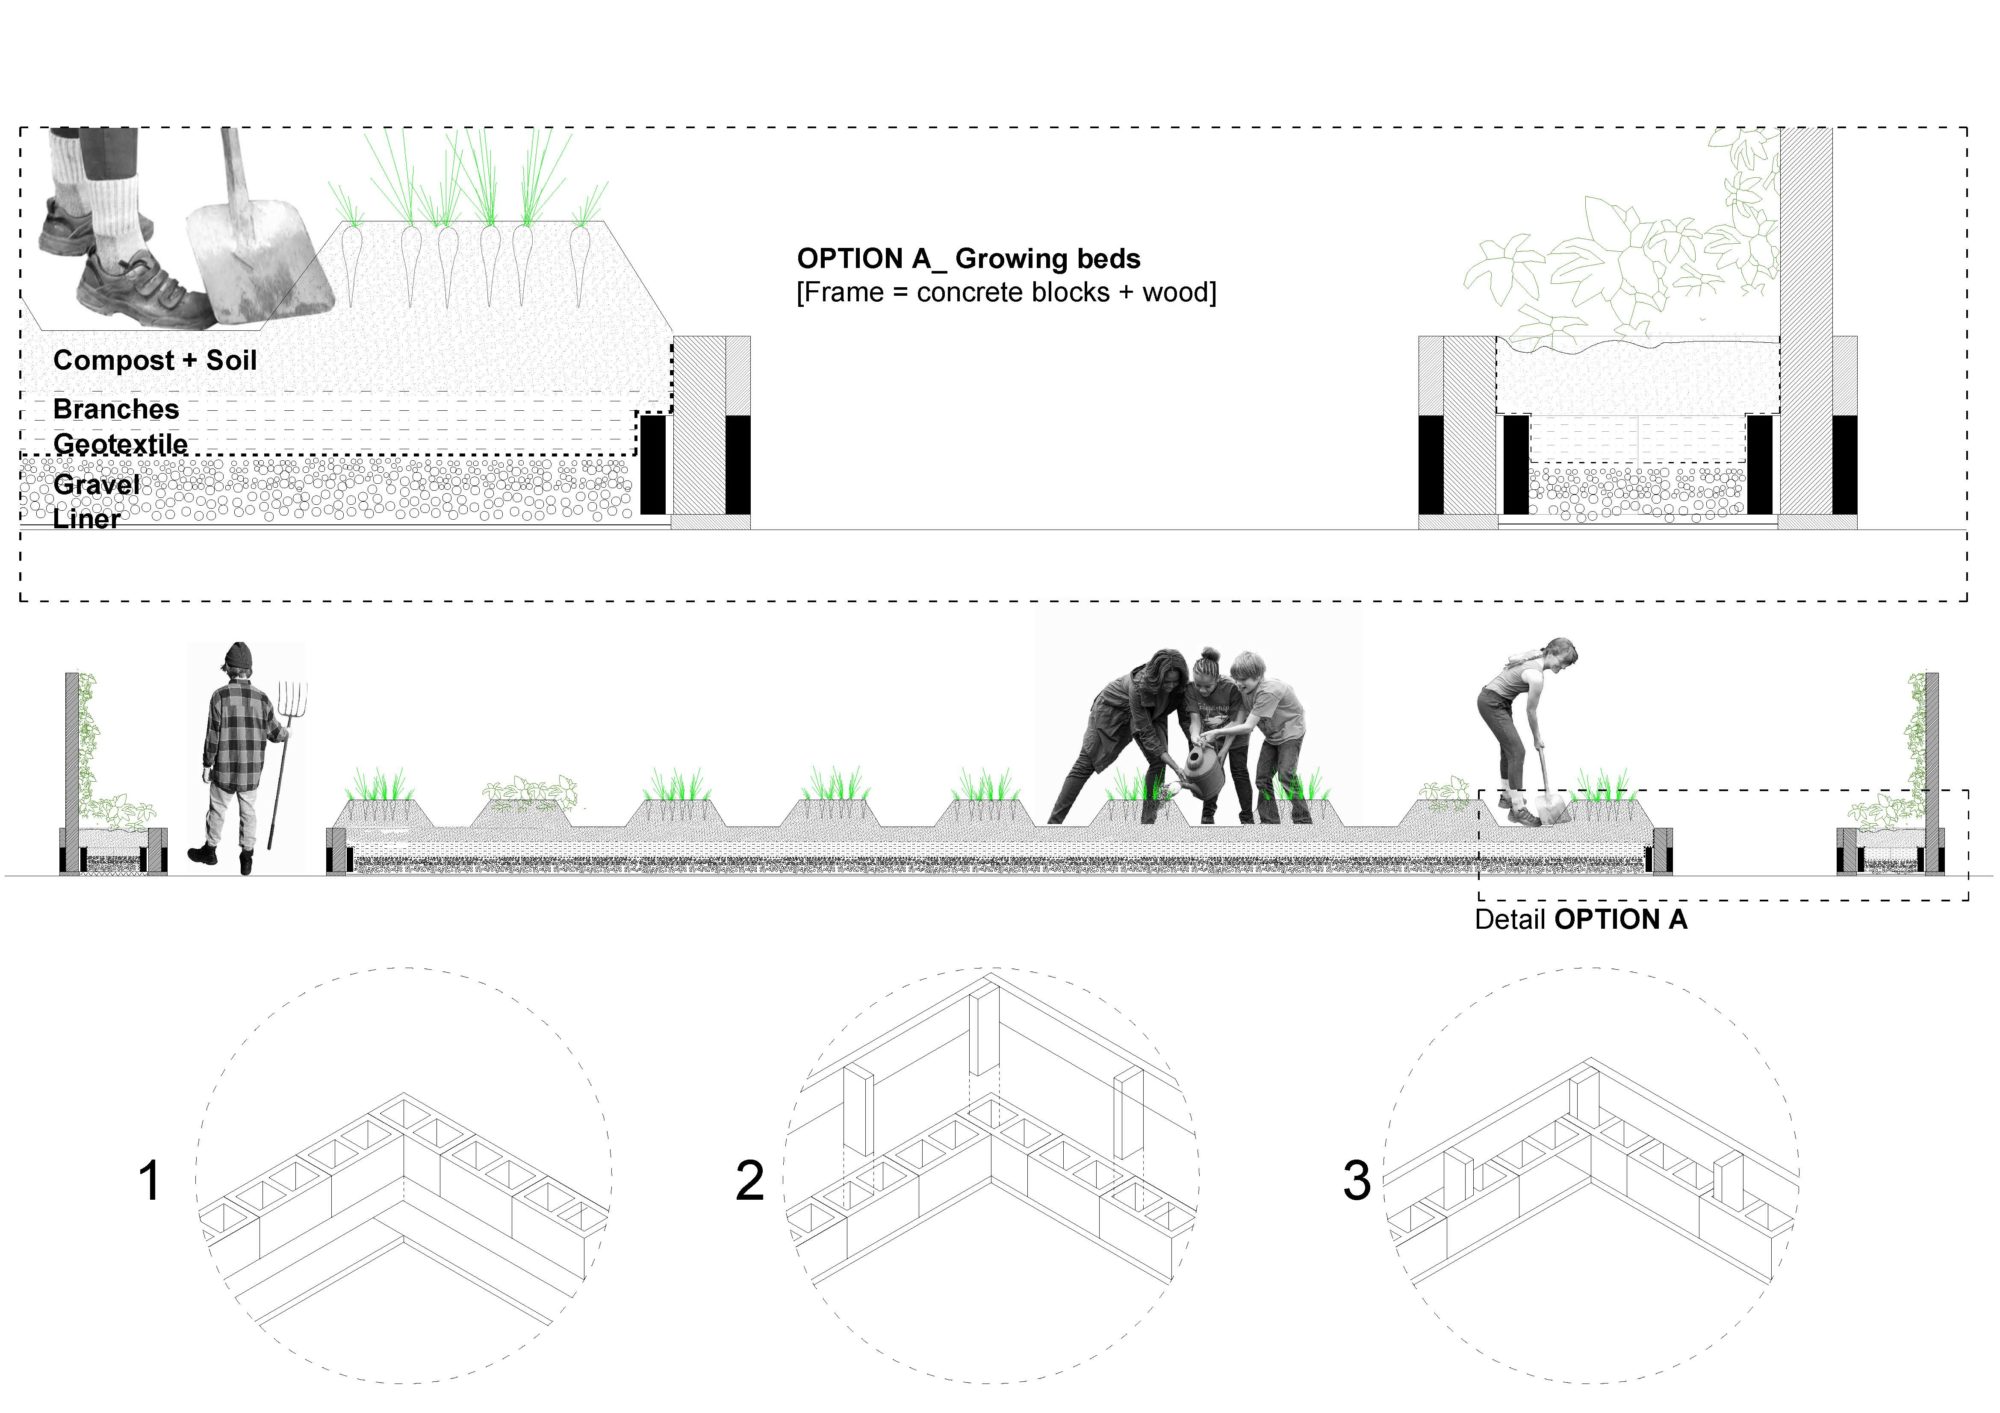 Example of a higher bed established on concrete with plenty of room to add branches, manure or gravel in the bottom for drainage or water absorption. In this case, a geotextile liner is enough to protect soil from leaking. ©The Foodprint Lab
Option B: Make thinner beds using drainage mats. As an alternative to thicker beds, one can reduce investment costs through using a simpler method. Kajodlingen is using a technique common to rooftop farms, with a drainage mat and a geotextile fabric that can be topped directly with just soil. This technique is also used on the Eagle Street Rooftop farm in New York (which you can read about in this article on Grow Academy). This drainage mat is around 1-3 centimeters thick, and it not only drains water but also holds water – which is much needed on a concrete farm. Read more about drainage mats in this handbook on rooftop farms.
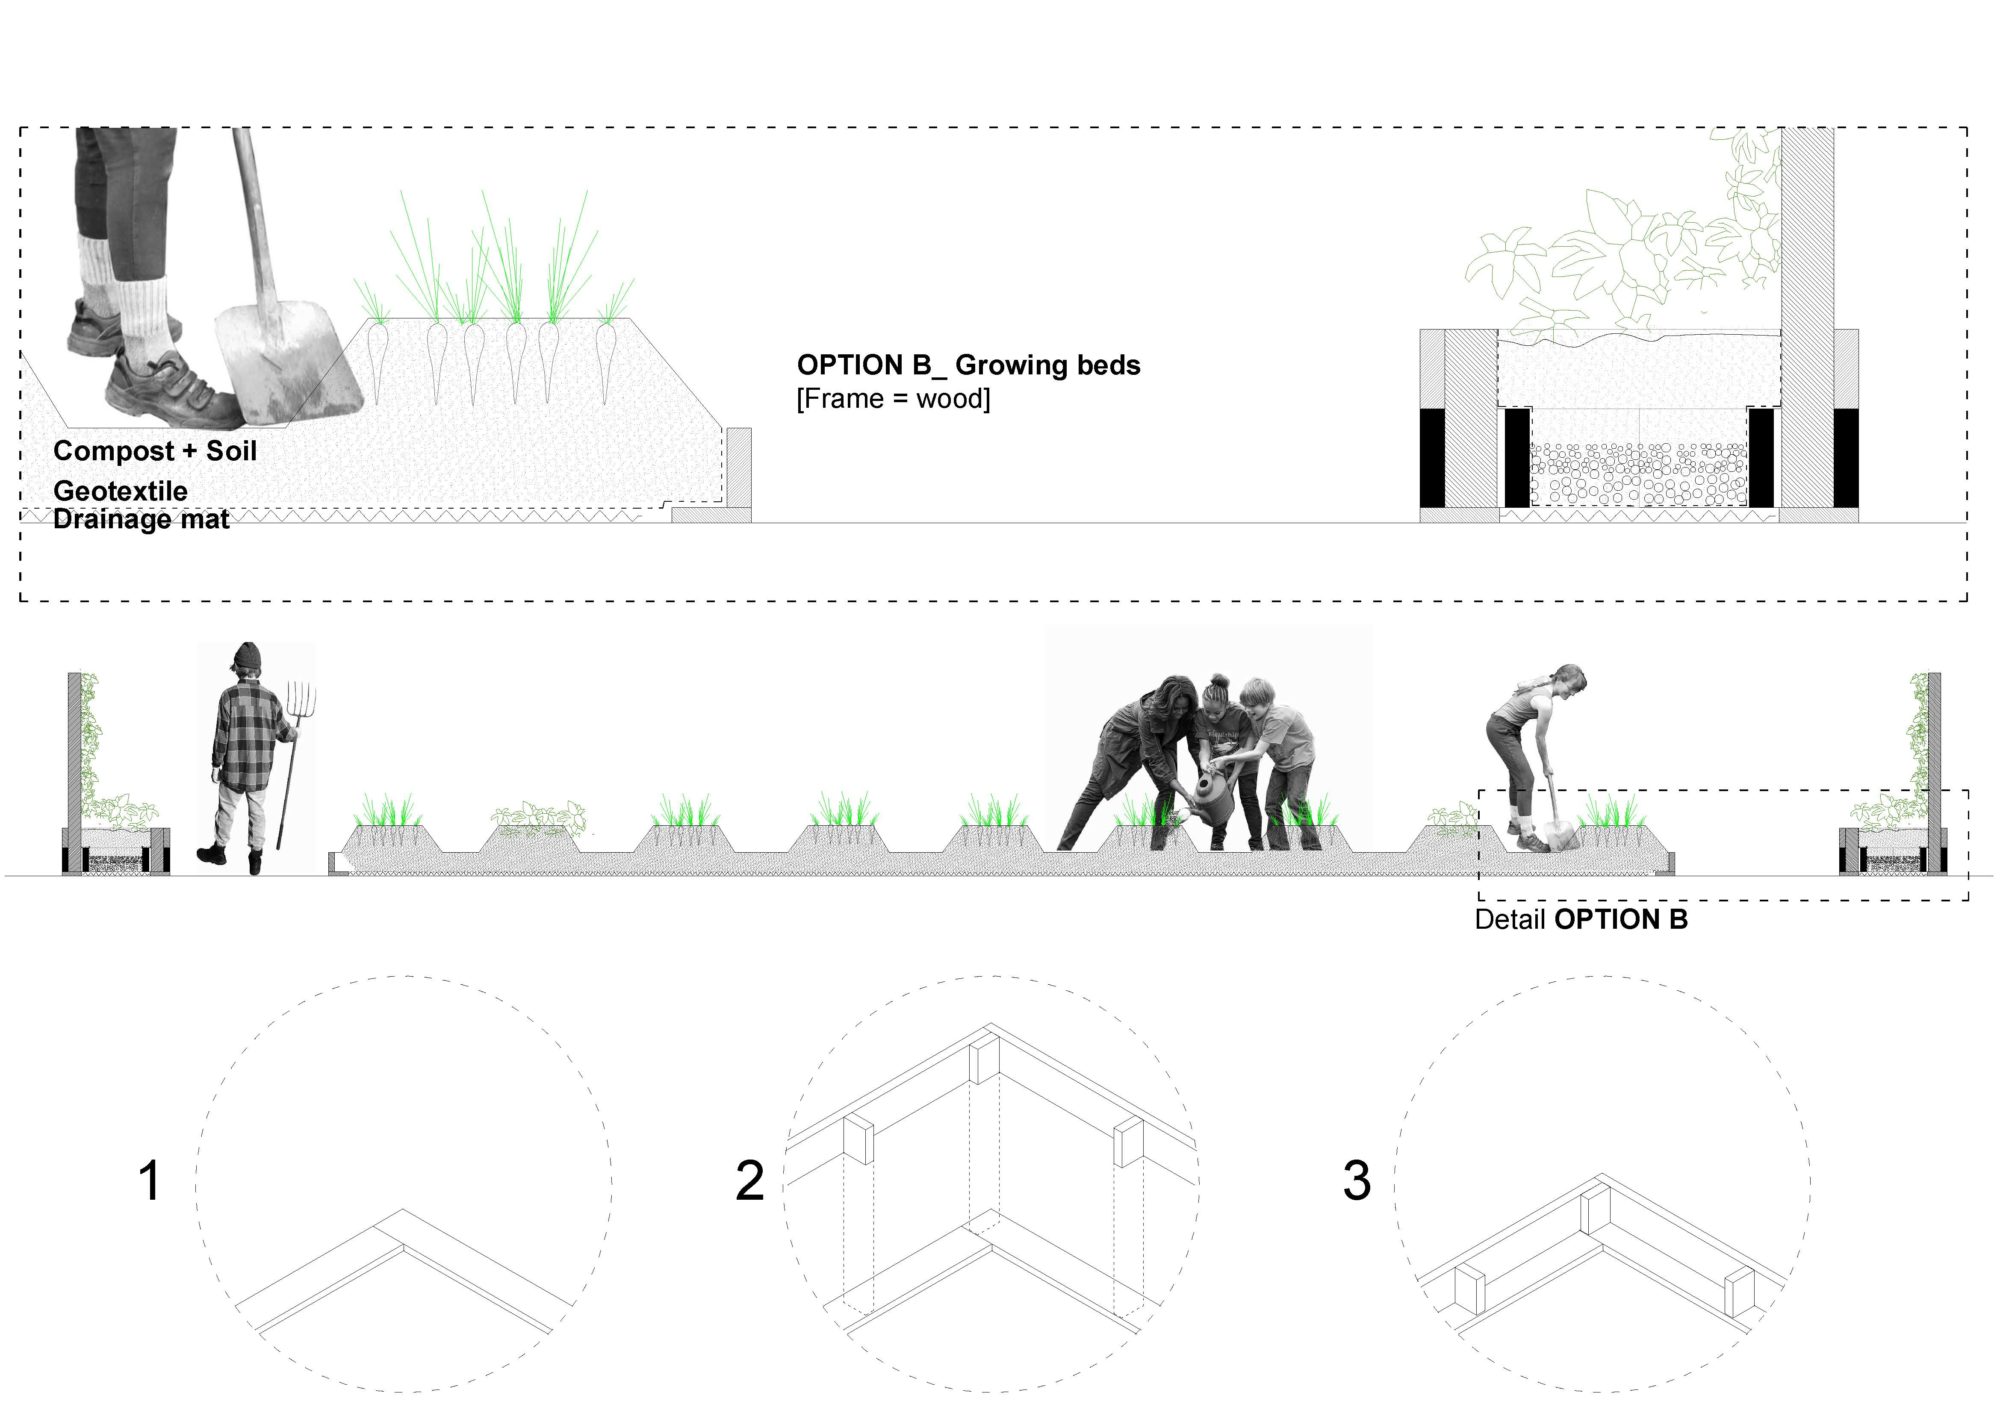 Example of a lower bed established on concrete with just a drainage mat (to hold and drain water) with geotextile and soil on top. ©The Foodprint Lab, 2018
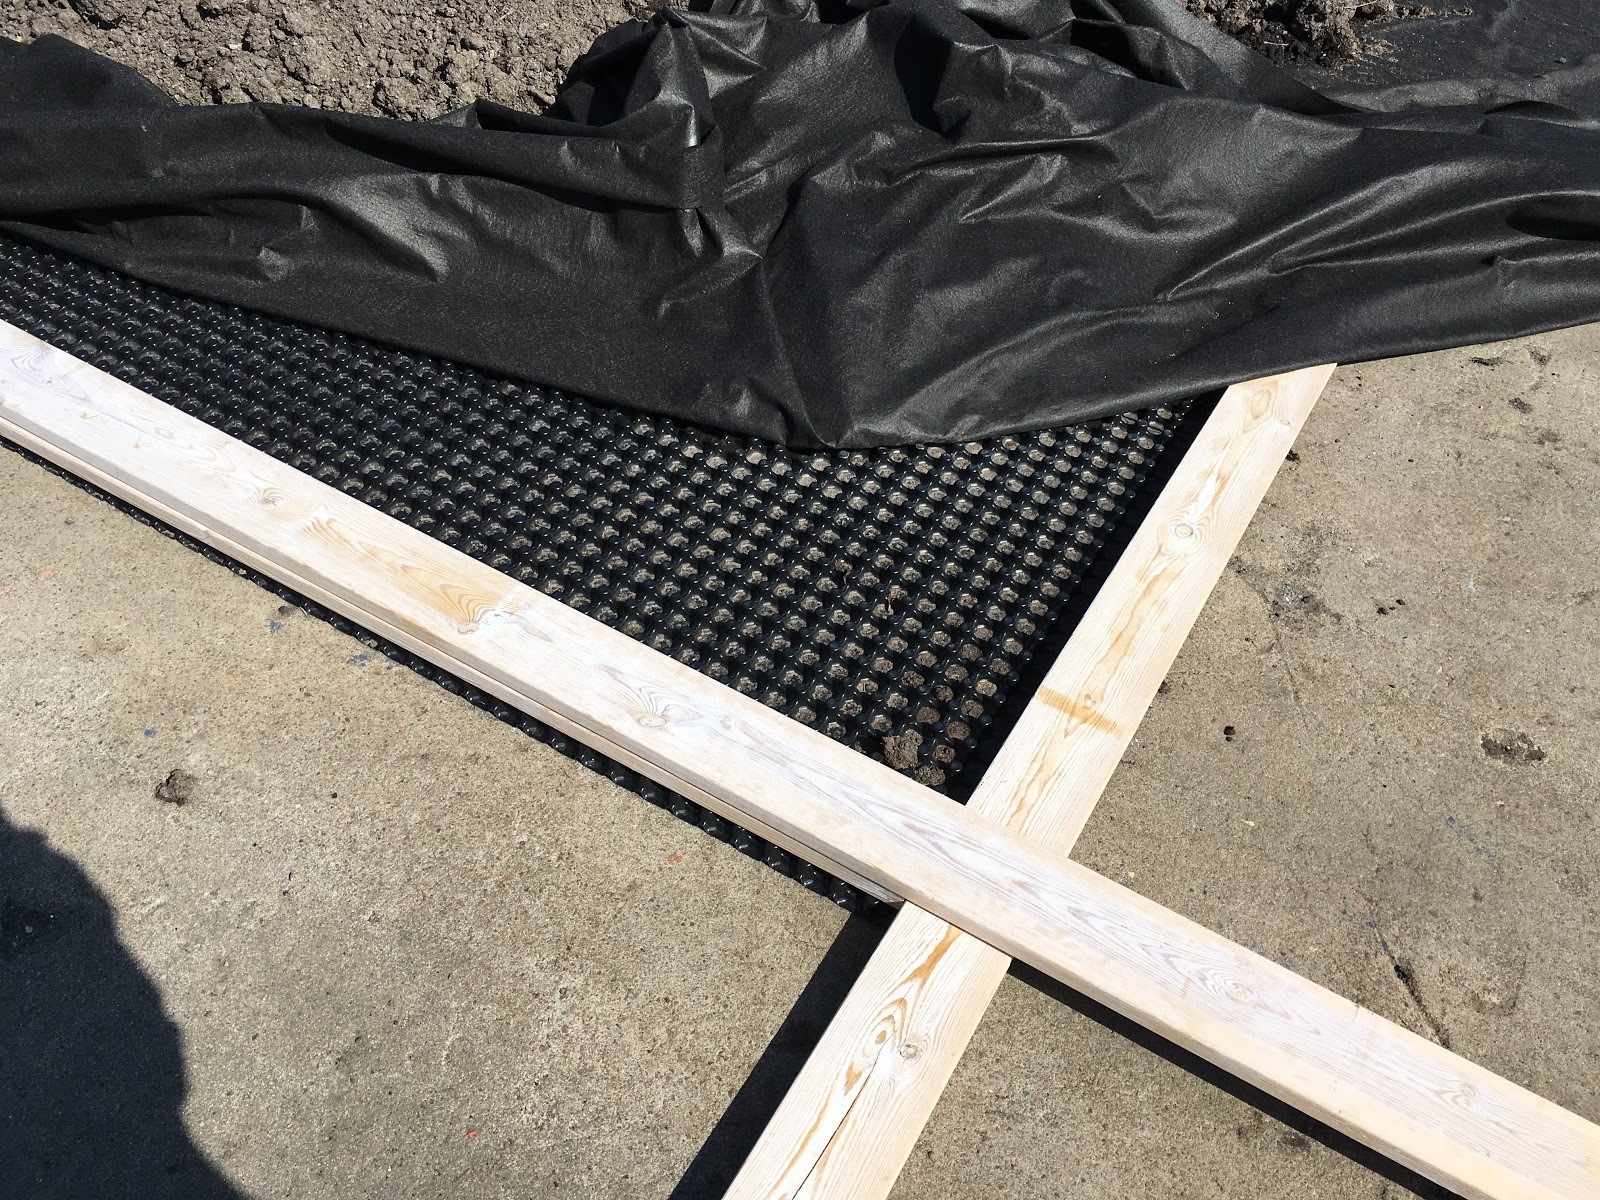 An image of the construction of Kajodlingens beds at Lindholmen. Instead of a geotextil membrane in the middle, they are using a pond-liner base. © Kajodlingen
STEP 3:
Third, fill your bed with soil. It is important that you have access to rich soil to fill your beds with in order to give your vegetables the best possible start. Building a raised bed on top of a hard surface requires a depth of at least 30 cm. Salad and herb gardens can be grown in as little as 10-20cm of soil depth, and Kajodlingen themselves used a soil depth of around 20 cm on average in their beds. However, the deeper the beds, the better suited they are for a broader range of vegetable crops, and the more water they hold! This may be useful to you as a private grower that could be flexible or fickle on what to grow from season to season. Also, since you are growing on a hard surface, your plants’ roots will not have the privilege of reaching the soil beneath ground level. Therefore, this is why you’ll need this extra depth in order to maintain healthy plant roots and to reduce watering needs.
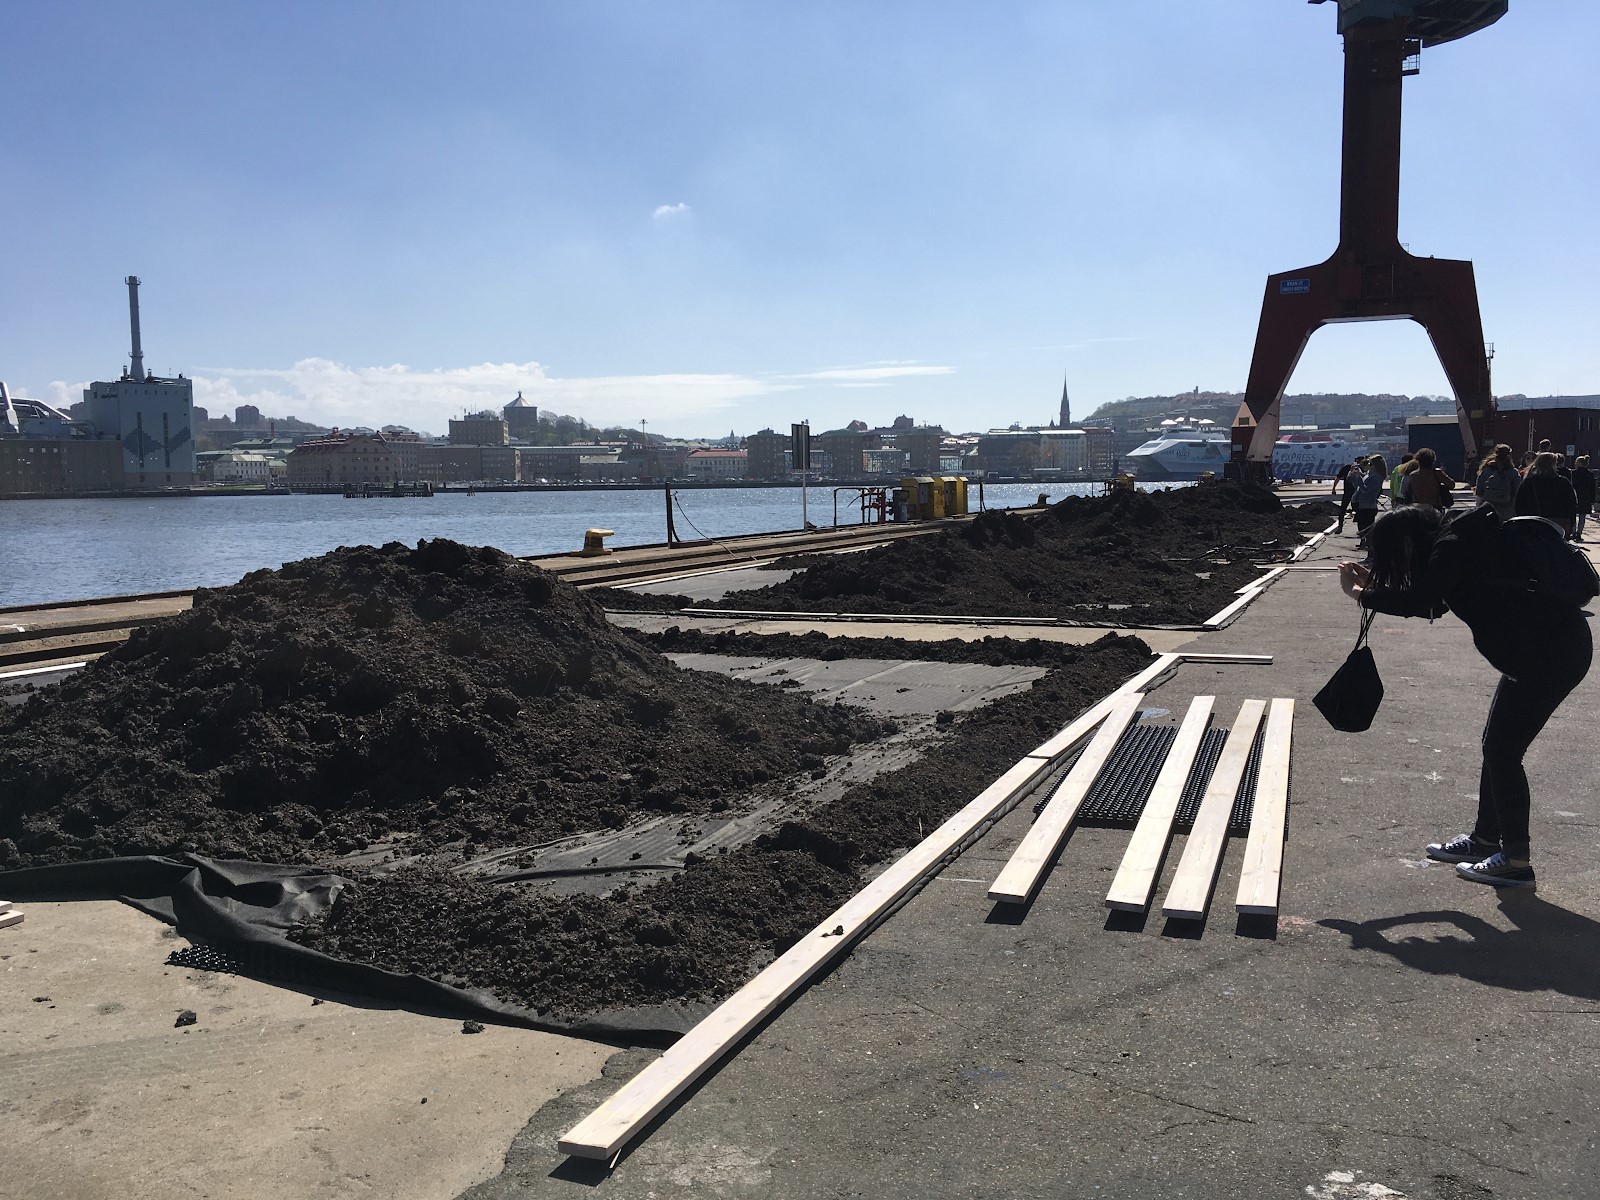 An image of the construction of Kajodlingens beds at Lindholmen. © Kajodlingen
Maintenance And Control
After building the structure, weeks may pass by and your crops may seem to be growing healthily. Even so, it is important to keep checks and balances on the system by monitoring some potential side effects that could occur when having a raised bed on concrete:
- Preventing Stains
It is important that you monitor if there is any leakage coming from your raised beds. This is because any water running off from under the bed will be brown and will eventually stain the concrete after a long period of time. Therefore, it optimal scenarios, there should be little to no runoff coming from beneath during regular gardening. However, runoff can occur after heavy rains. To reduce runoff as much as possible, try and abide to these guidelines below:
- Do not overwater your beds.
- Ensure that the soil has adequate organic matter and nutrients in order to maximise absorption of excess water.
- Remember to cover the beds during winter.
- If runoff does occur, immediately spray the soiled area with a high-pressure hose in order to dilute the water and disperse the staining runoff.
- Balancing Soil pH
Concrete is alkaline. Over time, this may affect the soil in your raised beds. It is thus important to test the soil periodically with a pH meter for the pH levels of the soil and adjust the levels according to the type of crop you have planted.
- Watering
The colour of the pavement also plays a role in how frequent one should water his or her raised beds. Raised beds that are built on dark pavements will usually require a higher need for water than those built on a lawn or natural substrate. This is important to take note of when considering their watering frequency.
- Wildlife and Biodiversity
Hard surfaces like pavement and concrete will essentially prevent beneficial creatures, such as earthworms, from entering your raised beds from below. It is therefore even more important to provide your soil with a source of “food” to attract these living organisms. Dose your soil with regular additions of healthy, living compost and manure. One example of this is that Kajodlingen regularly digs down bokashi compost in the soil on their rooftop farm (created with restaurant food waste). Not only will these additions improve your soil health, they will also attract beneficial creatures to local ecosystem!
We hope this step-by-step article is useful for those of you who have plans on growing on concrete. Good luck, have fun and do let us know if you need any further support in designing your farm or finding land to start it!
With Love,
Suzanna Törnroth
The Foodprint Lab Architects