News
How to Make a Hotbed
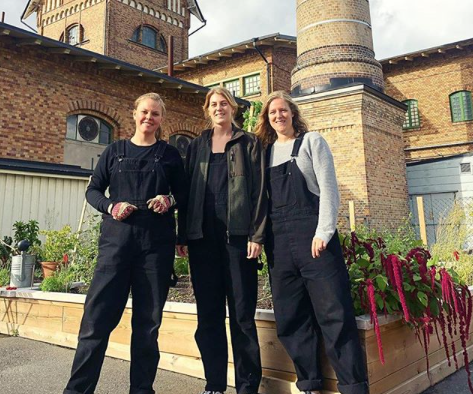
What is hotbed, you may ask? A hotbed is an efficient way of creating a warm microclimate needed to raise those little seedlings of yours during these cold winter months, and thus getting a harvest up to 2 months earlier. It is perfect to build during February/March when the cold temperatures and winds may not be beneficial for your crops’ growth, so the added heat from the compost process will make Spring come earlier for your crops! Follow our step-by-step tutorial below on how to make your own hotbed, with inspiration once again from renown Swedish farmer, Sara Bäckmo of Skillnadens Trädgård.
Pre-construction planning
The act of physically putting together the hotbed can be considered straightforward and simple, but it is worth noting that some amount of planning is required beforehand, in terms of logistics and materials. Here is a simple checklist for you to follow to ensure you have everything you need for a hotbed:
1. Ensure that you have a sufficient supply of manure. Horse or chicken manure will do, and Sara suggests around 10-15 sacks of them per pallet-sized hotbed. You would want it to be as big and high as possible, and a height of 50-70 cm of manure is preferable. The manure should be fresh, not more than 8 weeks old.
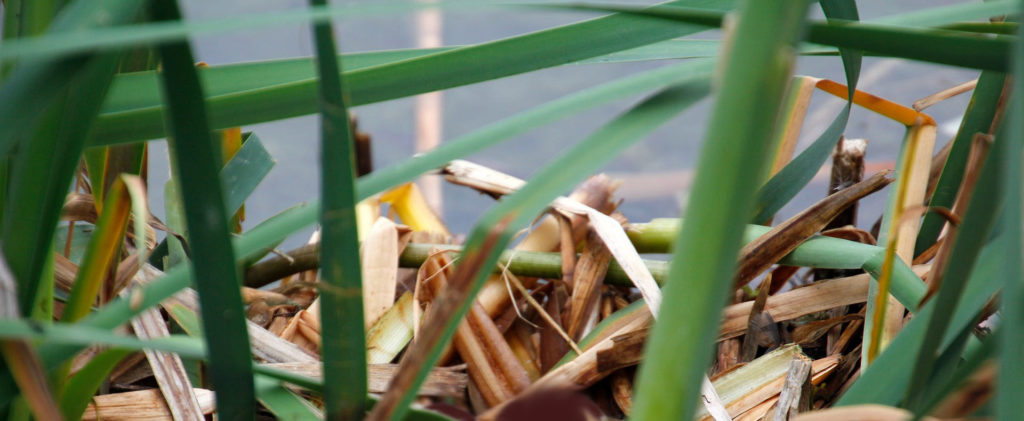
2. Use a lot of straw! You need a fair amount of straw or leaves mixed with your manure because it is the straw or leaves that burn and create the heat when they break down. Ensure that you have access to an equivalent amount of straw/leaves to manure before you start building the hotbed.
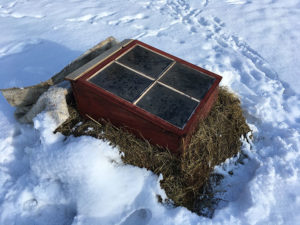
3. Prepare frame. You need a frame of some sort to hold the manure/straw and soil in place. This can be a wood frame or pallets – three EU-pallets in height is enough. Also, a simple compost mesh (kompostgaller) is enough to cover the manure/straw if you build the bed in a polytunnel.
4. There is a big difference between building a hotbed outside than building one inside a polytunnel. There are a few significant additional points that one needs to take note of when building a hotbed outside:
Hotbeds outdoors
– The hotbed needs to be built on a high, well-drained location so that it does not become waterlogged in the case of rain, watering or snow. Ideally, you would dig down into the ground in the autumn to reach the frost-free ground and start filling the manure/straw at this level.
– The hotbed needs to be insulated from the air around it, otherwise, heat will be easily lost to its surroundings. This can be done with straw (as shown in the picture below) or styrofoam.
– Insulation is required at night to prevent warmth from escaping. This can be done with an extra covering of blankets or other fibrous textiles on top of the glass/greenhouse plastic lid.
Step-by-step – How to build a hotbed
Sara chose to farm indoors in a polytunnel simply because it is more comfortable and easier – which we can agree with whole-heartedly. Creating a hotbed in a polytunnel means that one does not need to battle harsh winter winds, heavy rainfall, and cold outdoor temperatures.
1. Mix manure with straw and pack them into layers. Do not be stingy with the amount of straw leaves you mix in. Compressing the material with your feet can also be good to make the composting process go slower and thus the heat will last longer.
2. Lightly water with hot water after each layer is made, as moisture and heat jumpstart the composting process. Another tip is to add pee to your warm water which also greatly speeds up the process.
3. Build high! It is suggested to build as high as possible (often recommended at least 50-70 cm in height) – because more material means more warmth, and more initial warmth means that the heat in the hotbed will last longer.
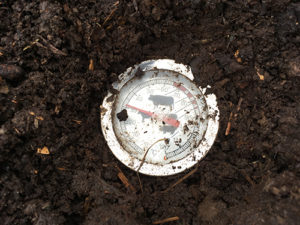
4. Time to place a thermometer in the set-up to follow any temperature change. This is the fun part! Place the monitor of the digital thermometer outside of the hotbed, and insert the temperature-measuring end of the thermometer into the hotbed. Note: Do not place the monitor inside the hotbed, as condensation can destroy the apparatus. The composting process has begun when you notice any temperature increase.
5. Add a lid to the hotbed to ensure no heat is lost. The lid can be made of simple greenhouse plastic and wooden beams – or an old window. For the first few weeks, you can also add additional blankets to insulate and prevent heat from escaping the bed. These blankets can then be removed later as there is a lesser risk of really cold temperatures.
6. Add 10 cm soil. When the temperature has peaked (perhaps rising to 40-70°C) and then dropped down to about 30°C on the surface of the bed – we are ready to add soil (about 10 cm should be enough) on top of the manure/straw layers in the hotbed. This is to make sure we do not kill all the beneficial micro life in the soil if it gets too hot.
7. Planting/seeding time! After adding soil and watering the bed, we are ready to sow our seeds. Choose quick growing seeds like spinach, salad greens, ruccola, radish and turnip or other leafy greens which you can harvest as young plants. It is also beneficial to plant indoors for a month before the hotbed is ready to be planted, and young salad plants will explode in growth as they get out in the hotbed.
8. Enjoy harvesting from your hotbed up to 2 months earlier than otherwise. If prepared in early February we can get a harvest as early as March. In winter, no watering or ventilation is needed. As the season gets warmer in about a month or so later you shall consider taking away the transparent lid every now and then and watering so it does not become too hot and dry in the bed. When the temperature outside the hotbed is warm enough for the plants to survive we can remove the lids.
For a more visual tutorial, watch Sara Bäckmo’s video below:
For those of you feeling a little experimental, you can make a hotbed with all sorts of materials, including old clothing! We would love to follow your hotbed-making process, so tag us at #growgbg on your social media uploads of your hotbed! Maybe you would even like to share new and interesting tips with us, so write into [email protected].
Happy coming weekend everyone!
Related articles